
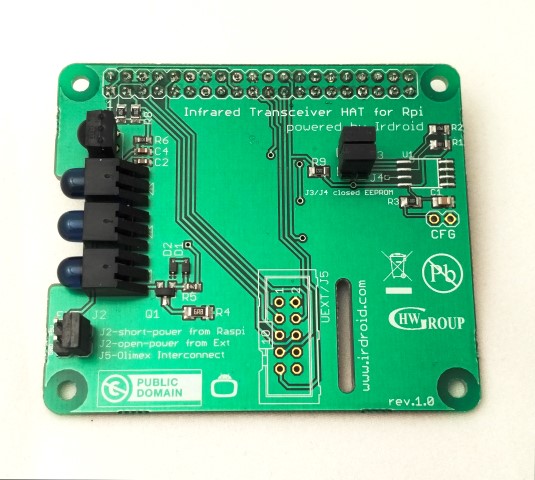
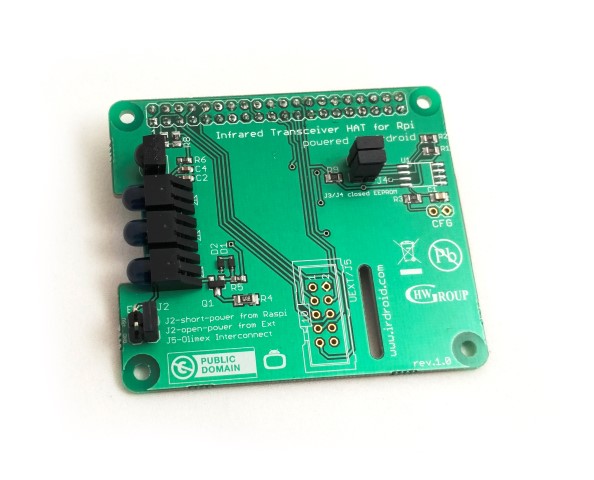
This Blog post is a continuation of my previous Blog post for turning raspberry Pi into a Infrared Remote Control using the Irdroid USB Infrared Transceiver. This time we will be using the Irdroid-Rpi Infrared Transceiver HAT for Raspberry Pi. The Irdroid-Rpi Transceiver HAT has three powerful IR leds , that will allow wider remote control angle (you dont need to point it to the target IR controlled appliance – it can be behind it ) and improoved Infrared Remote control Range – more than 15 meters. The module also has a sensitive Infrared Receiver that will allow you to scan and digitize infrared remote controls of your choise.
In this example we will be using a Raspberry Pi model B+ with 512 MB of RAM as a system for running the open source software LIRCd , responsible for sending and receiving infrared commands in Linux.
I am using the following tools ( Hardware ) for our tests:
1x Raspberry Pi model B+ 512MB RAM
1x 16 GB SDCARD for installing Raspbian
I also use the following software tools :
The latest version of LIRC
We will also use Raspbian , installed using NOOBS on a 16 GB sdcard.
The Irdroid-Rpi Infrared Transceiver HAT uses the Lirc-rpi and lirc-dev kernel modules, that normally comes with Raspbian
-

- Irdroid-Rpi Infrared Transceiver
-
- Irdroid-Rpi Infrared Transceiver
-
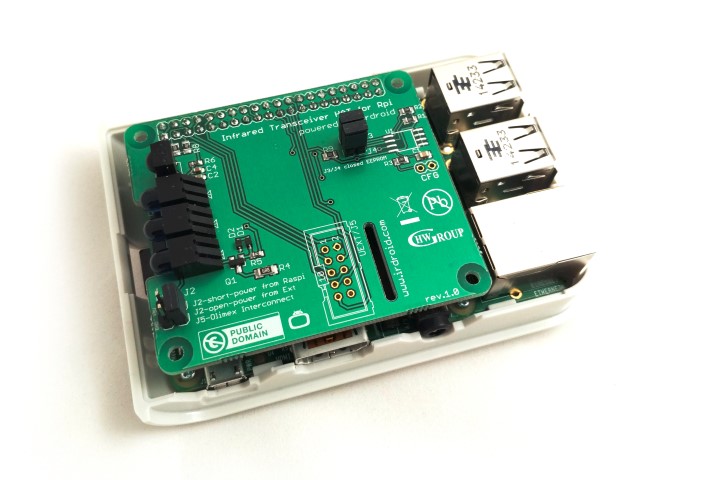
- Irdroid-Rpi Infrared Transceiver_attached
Below are the steps for configuring Irdroid-Rpi with LIRC on Raspbian:
Attach the Irdroid-Rpi Infrared Transceiver HAT to your PI and turn your it on.
After it boots issue “sudo apt-get install lirc lirc-x” and wait until the lirc packages are installed on Raspbian.
cd to /boot and edit the config.txt file using your favourite text editor and uncomment “dtoverlay=lirc-rpi” . This will enable the lirc-rpi gpio kernel driver, and it will allow us to use the default IR Transmit and Receive GPIOs which are GPIO17 and GPIO18 (The Irdroid-Rpi board uses GPIO17 for IR TX and GPIO18 for IR RX , so you don’t need to change the pins. UPDATE!!! For Kernel 3.18+ where device tree is enabled by default you will need to add “dtoverlay=lirc-rpi,gpio_in_pin=18,gpio_in_pull=high,gpio_out_pin=17”
“device_tree=” in order to disable the device tree.
cd into /etc and edit “modules” using your favourite text editor add “lirc_dev” and under it “lirc_rpi” then save the file.
cd into “/etc/lirc” and edit the file “hardware.conf” with your favourite text editor add “–listen” as follows in “LIRCD_ARGS=”–uinput –listen” then save the file . That will instruct lirc to listen on the default port (which is tcp port 8765), allowing connections from the local network (We will need that later for our lirc client application).
Download an example lircd configuration file which includes some sample remotes. Issue “cd /etc/lirc” then issue “sudo wget http://irdroid.com/db/t.conf -O lircd.conf ” to download a sample config file with a sample “remote controls in it”
Reboot your Raspberry Pi and make sure lircd is running , if not start it by issuing “sudo /etc/init.d/lirc restart”
Now you can play with the LIRCd Android clients like “Amote” , and configure your smartphone as a custom user interface for controlling IR appliances using your newly configured Raspberry Pi Infrared Remote control.
As in my previous post I will again use the “Amote” lirc client application for Android in order to control my new Raspberry Pi infrared Transceiver.
The Amote app will allow you to:
Configure the network settings to connect to The lircd that runs innside Raspberry Pi
Allow you to connect to that lirc daemon and query for the remotes.
- To assign and make custom buttons and interface for any of the remotes in the Lirc database . Below are some screenshots and videos.
We have a special discount ( 20% Off )offer for Raspberry Pi owners, you can purchase a Irdroid-Rpi Infrared Transceiver HAT with discount using the link below and applying the “raspberry” coupon on checkout .
http://www.irdroid.eu/product/irdroid-rpi-infrared-transceiver-raspberry-pi/
We also provide a ready configured and tested install of the LIRC daemon on a sdcard so that you can directly plug the card to your Raspberry Pi (for model B+) and save you some typing in the terminal. You can purchase a 16 Gigs SDcard with Raspbian and LIRCd configured for Irdroid from the link below:
Downloads: