In this blog post I will share my experience on how to rapidly develop custom infrared remote controls for Android using the Irdroid Hardware modules, and in particular the Irdroid WiFi to Infrared adapter module and the Irdroid USB Infrared Transceiver module.
You will learn how to:
- Rapidly develop Infrared remote control Apps for Android
- Design custom remote control screens / templates.
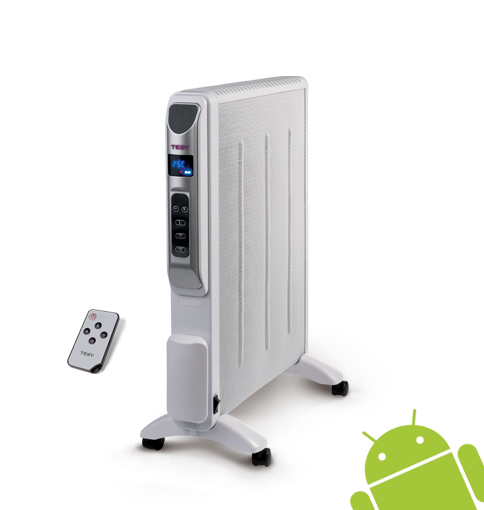
The winter is coming and i have decided to purchase additional heater unit for our living room.After i made a short investigation on the Internet I found that there are plenty of home heating units, with ability to be controlled via small infrared remote controls like this one. In my particular case the heating unit is Tesy (Bulgarian brand) MC 2014. The unit comes with a small infrared remote control, that allows the user to set the heater temperature, to turn on/off the unit, to set a on/off timer as well as to set the unit to work @ 1000W or 2000W.
Immediatly after i purchased I have decided to make a simple App for Android, showing the same small remote control interface on the Android Smartphone screen, and to allow the user to control the unit via the APP over WIFI, using the Irdroid WiFi to infrared adapter module.
So far so good , but how to transmit the same codes that the remote transmits to the Tesy MC 2014 unit ?
Well, the Irdroid WiFi to Infrared adapter consist of two modules – the main wifi unit and the USB Infrared Transceiver unit. The Irdroid USB Infrared Transceiver unit can be used to transmit and receive infrared signals. So I used the Irdroid USB Infrared transceiver to scan the remote codes, using Winlirc / LIRC . In my particular case I have used Winlirc and the built in irrecord command line tool to record the infrared remote control codes and to generate a file with that codes.
To be able to scan infrared remote codes under Windows you need to install the Irdroid USB IR transceiver ACM driver for Windows by downloading it from here https://irdroid.com/downloads/?category=5 , you will also need to download and configure WinLirc (Which is described here : https://irdroid.com/downloads/?did=17)
After I have scanned the Infrared remote control buttons of Tesy MC 2014, I ended up with the following file:
 # Please make this file available to others
 # by sending it to <lirc@bartelmus.de>
 #
 # this config file was automatically generated
 # using lirc-0.9.0(IRdroid USB IR Transceiver)
 #
 # contributed by
 #
 # brand:                       Tesy MC2014
 # model no. of remote control:
 # devices being controlled by this remote:
 #
begin remote
 name  Tesy
 bits           16
 flags SPACE_ENC
 eps            30
 aeps          100
 header       8969  4395
 one           599  1607
 zero          599   489
 ptrail        604
 repeat       8981  2156
 pre_data_bits   16
 pre_data       0xFF
 gap          39670
 repeat_gap   95433
 toggle_bit_mask 0x0
 begin codes
 power                    0x50AF
 plus                     0x20DF
 minus                    0xE01F
 timer                    0xF807
 temp                     0x08F7
 end codes
end remote
The above file is used by LIRC to regenerate the Infrared Signals transmitted by the TESY MC 2014 remote. This file is to be downloaded to the Irdroid WiFi to infrared adapter. The procedure for adding new lirc conf files to the Irdroid / LIRC database include sending an email with the file to info@irdroid.com and adding the file in the Irdroid WIFI database. After that I have added the Tesy lirc conf file to the Irdroid WiFi to infrared adapter by visiting the link https://irdroid.com/db/database/index.php?dir=Tesy%2F and clicking on the file Tesy.conf (make sure that you are connected to the Irdroid WiFI to infrared adapter and the adapter itself is connected via ethernet cable to your home router)
So finally the Tesy.conf file is in the Irdroid WiFi to infrared adapter unit and I can now connect to the adapter using the Amote app for android and control the Tesy MC 2014 from the Amote App.
That is OK but i want to have the same UI design as the original remote, so what to do ?
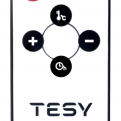
I have decided to take a picture of the remote, I have used GIMP to edit that picture in order to use it directly as a base for my Tesy remote UI. So now I have the same picture of the Tesy MC 2014 remote , but how to make the buttons on the picure clickable / tapable. I decided to use a second picture loaded the same way as the main ui picture but not visible defining color regions at the places where the buttons are on the original Tesy Remote picture. The user sees the remote control picture and after he tap on the relevant button it is recognized by color from the reference picture and a particular action is assigned for every button.
Once started the application main activity uses the JAVA LIRC client library to connect to the Irdroid WiFi to infrared adapter and to establish a connection with the listening LIRC server Establishing a socket connection the the Irdroid WiFi to infrared adapter is very easy. You need to add the following in your onCreate() method:
client = new LircClient(“192.168.2.1”,8765, true, 3000);
After a connection is estavlished you may start sending commands to the listening LIRC server by issuing:
client.sendIr1Command(“Remote_NAME”, “Remote_Command”, 1);
For the five buttons that we have on the Tesy MC 2014 we assign the following lirc commands as per the LIRC conf file that we previously made:
client.sendIr1Command(“Tesy”, “timer”, 1); // Set unit timer
client.sendIr1Command(“Tesy”, “temp”, 1); // Set unit Temperature
client.sendIr1Command(“Tesy”, “power”, 1); // Power On / Off
client.sendIr1Command(“Tesy”, “minus”, 1); // minus
client.sendIr1Command(“Tesy”, “plus”, 1); // plus
Every command has an assigned color from the mask image loaded in parallel with the main UI image, once the user tap in that color region the relevant command is fired up to the
Irdroid WiFi to infrared adapter and the relevant Infared code is transmitted.
So, voila we have a custom remote control, developed in 2 hours and a nice heater for the cold winter nights 🙂
Video
Downloads:
Tesy.conf – LIRC remote control conf file
Tesy App – APK file (Signed)
Tesy App – Source Code
You dont have a Irdroid WiFi to Infrared adapter?
Purchase one from the links below.
[print_thumbnail_slider]


