The image below is a link. Try to click on it.

Recording Air Conditioner remote controls using Irdroid


Recording Air conditioner remote controls with Irdroid

Recording Air conditioner remote controls with Irdroid

Recording Air Conditioner (AC) infrared remote controls can be a challenge, when using conventional methods for recording IR remote control codes with LIRC (The Linux Infrared Remote control software package).Recording off-the-shelf TV / STB infrared remote control includes running the irrecord utility that comes with LIRC and recording the physical infrared remote buttons one after another and storing the data into a flat text file. The above procedure is standard for recording home appliance IR remotes, except for Air Conditioner remote controls.

OK, what is different about the AC infrared remote controls ?

Well, the difference is that the AC infrared remote control codes are longer in comparison with any TV, DVD, STB or any other IR controlled equipment. The main difference is the way these infrared remote controls work.

The AC remote control sends all its settings (current state) at once (in one infrared code sequence) . That means when you set for example a temperature, air direction , mode etc these are all send with one IR command which contains all the current settings (current state) with other words all the data in the remote. It means that normally we can’t record remote buttons individually by pressing each button and recording with LIRC, as with every button press we get the remote current state, not a single pressed button.

We can record ON command, OFF command in combination with the current setting/state (mode – heat, current temperature;air direction etc) . We can do that using a patched version of the IR record utility, which is part of the LIRC software package which will allow us to record longer infrared commands.

The LIRC irrecord utility assumes maximum infrared code length of 200 bits, which is a limitation and it is not enought as most of the ACs are using code length > 200bits (some are using code length of ~500 bits) .To change the setting, we need to edit the source file irrecord.c that comes with the version of LIRC , attached to this article.

In particular we have to edit line #109 of irrecord.c

  • #define MAX_SIGNALS 200

this defines the maximum signal length that irrecord shall consider as valid. We shall change that to :

  • #define MAX_SIGNALS 600 (to have some reserve and make sure we cover all ACs with code length over 500 bits)

After changing the file we have to compile LIRC by issuing:

./configure
make
make install

*My configuration for the above procedure was a Laptop running Ubuntu Linux 14.04 LTS
*In Windows the user needs to download WinLIRC, edit the irrecord.c file and recompile the software

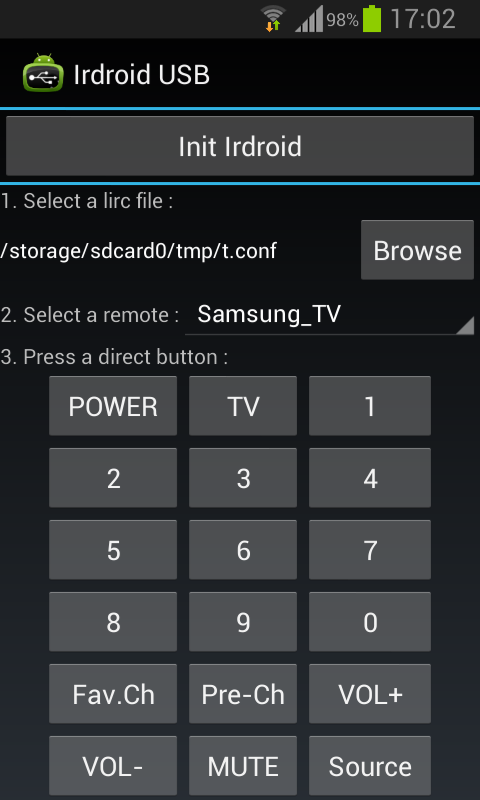
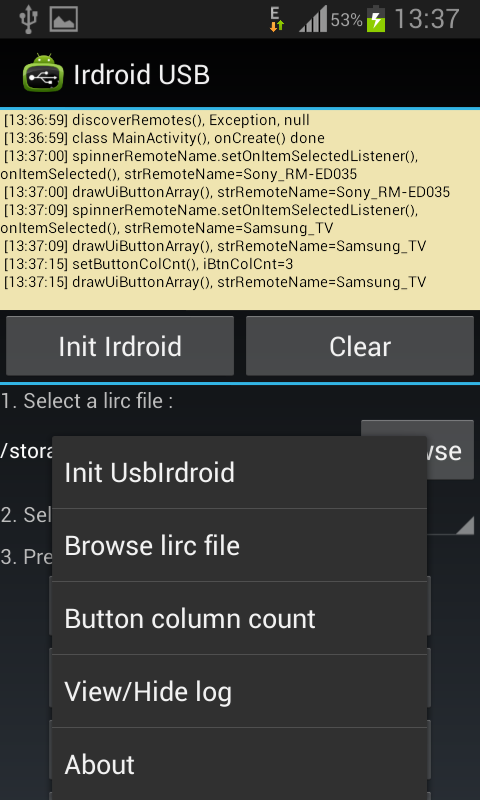
After the install process finishes we should be able to use the Irdroid USB IR Transceiver or the Irdroid-Rpi (infrared transceiver for Raspberry Pi) in combination with irrecord to record any AC infrared remote control code in RAW form.

The irrecord syntax:

irrecord -f -d /dev/ttyACMx /etc/lirc/lircd.conf

*depending on your configuration and the number of the serial ACM devices used in your system the ttyACMx can be ttyACM0 or any other number depending on the number of serial ACM devices in enumerated in your system.

the irrecord -f option forces the program to go in a RAW IR record mode (it will not try to decode any of the known IR protocols like RC5, RC6 etc)

Example lircd.conf file with a scanned toshiba Air Conditioner ON command :

begin remote

name Toshiba
flags RAW_CODES
eps 30
aeps 100

gap 1000000

begin raw_codes

name ON
3285 1578 447 405 405 405
426 1173 469 383 426 1173
469 383 426 383 426 383
426 1173 469 1173 469 383
426 383 426 383 426 1173
426 1194 426 405 405 405
405 447 383 447 383 405
405 405 405 405 405 405
405 405 405 405 405 405
405 405 405 405 405 1215
405 405 405 405 405 405
405 405 405 405 405 405
405 405 405 1215 405 405
405 405 405 405 405 405
405 1215 405 405 405 405
405 405 405 405 405 405
405 405 405 1237 405 405
405 1215 405 1215 405 1215
405 1215 405 1215 405 1215
405

end raw_codes

end remote

*The above example represents a ON command, and the current remote state (mode heat,22 degrees celsius, swing mode). You maybe noticed that there are repeating codes like 405, 1215, 1173 , these are the bit representations normally a sequence of zero’s and one’s . these numbers also represent the pusle / space IR signal length in microseconds. The big number in the begining is the so called “lead-in” “informing” the receiver that a infrared command starts.

Initially the program will try to identify the so-called “IR Gap” , it will ask you to press different buttons from the physical remote control. Even if the Gap is not found you can still continue and record button presses from the target remote and store them in a flat lircd.conf file, which is later used by lircd for reproducing the recorded infrared signals.

*The recorded remote control in the above example was for an old Toshiba Air Conditioner. A friend of mine asked me whether he can use one of the Irdroid modules to control (Turn On and Off) the Air Conditioner at his office. In particular to do that using WinLirc in Windows. I have successfully scanned the physical remote control and tested successfully with the target AC. Later on I find out a nice automation utility for windows which has plugins for LIRC and a Scheduler, giving the option to schedule infrared remote control commands. Convenient , isn’t it?

Downloads:

Hardware:

The image below is a link. Try to click on it.

Infrared task automation in Linux using the Irdroid USB Infrared Transceiver

This is a Blog post with example usage of the Irdroid USB Infrared Transceiver in Linux for Infrared Task Automation. In the past we had a number of project that inluded creating scripts and cron jobs for executing sequences of infrared commands one after another , defined in scripts / macro’s .

In particular we had a client who needed to send a IR command to a number of STBs (IPTV distribution company) to wake them up from “sleep mode” every couple of hours, before the STB goes sleep mode.

The above task is achievable using the Irdroid USB Infrared Transceiver in Linux, or using the Irdroid-Rpi in combination with a Raspberry Pi.

In practice the client’s hardware configuration consisted of a transcoding server, running Ubuntu 14.04 and a LIRC Daemon for sending / receiving infrared commands. In this particular project my task was to set this box to work with the Irdroid USB Infrared Transceiver and issue a “Menu” command for the particular STB every 5 hours (which avoids the unit/s entering “sleep mode”) .

Tools used:

Tasks:

  • Compiling and installing LIRC on the Linux transcoding machine
  • Digitizing the Infared Remote Control used to control these STBs
  • Setting a CRON Job to send a infrared command every 5 hours


First I had to download a patched version of LIRC, compatible with the Irdroid USB Infrared Transceiver from the Irdroid.com download section (see the links at the end of this article). To use the patched version of LIRC , I had to compile it using the standard commands in linux:

  1. ./configure
  2. make
  3. make install

After installing LIRC, you will need a lircd.conf file which holds the remote control commands either in RAW form (pulse / space sequences) or a decoded HEX values / depending on the protocol these can be with different length.

For the above project the original remote control was not already available in the LIRC database (http://lirc.sf.net/remotes) , therefore I had to scan and record the remote control using the “irrecord” utility. The Irrecord utility comes with the LIRC package and it is used to record, decode and store the infrared signals from any (almost) infrared remote.

The Irdroid USB Infrared Transceiver enumerates as a standard Serial ACM device and if you dont have other serial ACM devices in the system it should enumerate automatically as ttyACM0 available as /dev/ttyACM0 .

To record the target remote I have used the command “irrecord -d /dev/ttyACM0 /etc/lirc/lircd.conf” . Once that command is issued you will be asked (in console mode) to make random button presses, which allows irrecord to analize and try to decode the target remote control protocol, then you will be asked to push and name every single button and at the end to save the configuration file and exit. Once done you should end up with a lircd.conf file located at /etc/lirc/lircd.conf .

To start LIRC issue “sudo lircd –device=/dev/ttyACM0 –listen=8765” this will instruct LIRC to listen on port 8765 on All interfaces .

Then you should be able to issue commands :

“irsend SEND_ONCE Remote_name Button_name”

Finally I had to set a cron job to run every 5 hours and issuing the “Menu” command in order to avoid the STBs going in “sleep mode”

That is done via Cron :

0 */5 * * * irsend SEND_ONCE Remote_NAME Remote_COMMAND

The above will send our command every 5 hours.

Downloads:


Dont have a Irdroid USB Infrared Transceiver?

– You can purchase one from HERE

The image below is a link. Try to click on it.

How to turn your Raspberry Pi into a fully functional infrared remote control

Irdroid USB and Raspberry Pi

Irdroid USB and Raspberry Pi

We have received many requests for assistance with making the Irdroid USB Infrared Transceiver to work with the Raspberry Pi and in particular with Raspbian Linux OS distribution. Below we provide a step by step guide for making the Irdroid USB Infrared Transceiver working with the Raspberry Pi. In this particular example we will be using a Raspberry Pi model B+ with 512 MB of RAM as a medium for running the open source software LIRCd , responsible for sending and receiving infrared commands in Linux.

I am using the following tools ( Hardware ) for our tests:

I also use the following software tools :

  • A custom port of LIRC for the Irdroid USB Infrared Transceiver (Source code available for download – see the links at the end of this Blog post)
  • We will also use Raspbian , installed using NOOBS on a 16 GB sdcard.
  • The Irdroid USB Infrared transceiver uses the standard Serial ACM drivers in Linux that come with most Linux Distributions. Raspbian also has this driver built-in , so we do not need to compile custom drivers etc for making it work with this Linux Distro.
  • You will have to download the custom version of LIRC (that support the Irdroid USB IR transceiver) from our website, so step #1 is downloading LIRC
Below are the steps for compiling and installing LIRCd for the USB Infrared Transceiver  on your system:
  1. Open a console via SSH to your Raspberry Pi, and type the following command to download LIRC:sudo wget https://irdroid.com/wp-content/uploads/downloads/2014/01/USB_transceiver_LIRC.tar.gz
  2. Extract the archive and “cd” in the “irtoy” directory
  3. Type “./configure.sh” Once it completes issue:
  4. “sudo make install” , this will compile LIRC and it will install it. Once the operation completes. You have a LIRC installed on your system, we still have to make install a lircd.conf file with the remote control “database” in it , so that LIRC can generate IR commands and blast the commands over the Irdroid USB IR Transceiver module.
  5. Issue the following command “cd /etc” then issue “sudo mkdir lirc” “cd /lirc”
  6. Then Issue “sudo wget http://irdroid.com/db/t.conf -O lircd.conf ” to download a sample config file with a sample “remote controls database”
  7. Then insert the Irdroid USB infrared transceiver module in a free USB port on your Raspberry Pi, the module should be enumerated and it should show in the system as a serial ACM device (by default if no other serial ACM devices enumerated it should be ttyACM0)
  8. to start LIRC issue “sudo lircd –device=/dev/ttyACM0 –listen=8765” this will instruct LIRC to listen on port 8765 on All interfaces

You can also add the command above into the rc.local file , so that you have a lircd running on boot. (before that command you need to add “sudo mkdir /var/run/lirc” so that allowing lircd to create its pid file in that directory).You should be able to connect to the LIRC daemon on the Raspberry Pi IP and Port 8765
Now you can play with the LIRCd Android clients like “Amote” and also Irdroid Macro Remote / NFC Remote , and configure your smartphone as a custom user interface for controlling IR appliances using your newly configured Raspberry Pi Infrared Remote control.

In my particular configuration, my WiFi router is in a room where there was no TV. I had to find a way to assure one ethernet port available in the living room in order to connect to my Raspbeery Pi board. I have found that I have two SMC powerline adapters, that work in transparent bridge mode, so voila I got that remote ethernet port for my Pi.

In my case the Raspberry Pi board is connected to my home WiFi router and the router has provided the Pi with a 192.168.1.4 IP address. To use it as a remote control with Any android device you will need to download the “Amote” application for android which will allow you to setup the lirc client network setting, and to configure a custom remote with layout and button naming.

The amote app will allow you to.

  • Configure the network settings to connect to The lircd that runs in the Raspberry Pi
  • Allow you to connect to that lirc daemon and query for the remotes in its lircd.conf file.
  • To assign and make custom buttons and interface for any of the remotes in the Lirc database . Below are some screenshots and videos.

For convenience you can make the LIRC daemon to start on boot as a service.

We have a special discount ( 20% Off )offer for Raspberry Pi owners, you can purchase a Irdroid USB IR Transceiver with discount using the link below and applying the “raspberry” coupon on checkout .

http://www.irdroid.eu/product/usb-infrared-transceiver/

We also provide a ready configured and tested install of the LIRC daemon on a sdcard so that you can directly plug the card to your Raspberry Pi (for model B+) and save you some typing in the terminal. You can purchase a 16 Gigs SDcard with Raspbian and LIRCd configured for Irdroid from the link below:

Click here to grab a configured and tested install of Lircd, configured with the Irdroid USB Infrared Transceiver on a sdcard ready for running on your Raspberry Pi model B+

Downloads:

The image below is a link. Try to click on it.

Flashing new firmware to Irdroid USB Infrared Transceiver

Flashing NEW Firmware to Irdroid USB IR Transceiver

Flashing NEW Firmware to Irdroid USB IR Transceiver


The Irdroid USB Infrared transceiver does not have a bootloader and firmware update is only possible via a ICSP serial programmer. The firmware can be updated using MPLAB and a PIC programmer. In order to program the module you will have to remove the plastic cover. To attach to the module you wil also need a 5×1 male pin header. Attach the pin header to the PIC programmer , then connect to the USB Infrared transceiver board as shown on the pictures below. You need to provide  power to the module with the PIC programmer. That option has to be ticked in the PIC programmer settings in MPLAB. The import the target HEX file and program the module. After a successful programming the Irdroid USB blue led should be lit.


Providind power using the PIC programmer

Providind power using the PIC programmer


Tools used:

  • PICKit3 programmer
  • 5×1 male pin header
  • MPLAB 8.92

Downloads:

The image below is a link. Try to click on it.

Custom Designed Infrared Remote control Apps for Android™

If you need an custom designed infrared remote control App for Android, we offer an inexpensive infrared remote control App Development service. You can order a custom designed application for your infrared remote control appliances right away at very competitive cost.

What’s Included?

  •  Design of the App user interface
  •  Digitizing your product infrared remote control
  •  Programming your Infrared Remote control App.
  •  Testing and Delivery of APK files
  •  Publishing in Google Play (*on request)

How it Works?

Once you make an order for your custom design application, we will send you a customer questionnaire that you have to fill. The customer questionnaire includes some standard inputs that we need to have in order to develop your application. For more information you may also visit : http://goo.gl/RE5Q0O

We will also request:

  • The Product / Appliance infrared remote control and / or the infrared codes.
  • The App Name that you choose.
  • Logo for the Application.

Any Samples? How will it look like?

We have the possibility to practically digitize your physical remote control, and therefore the App user interface will look like the physical IR remote control.
The video below demonstrates an app, developed by us for controlling a TESY MC2014 home panel heater unit. The App was developed using the same technique we have described above.

Video


How long will it take?

After the order is placed, we have 30 days to develop the App for you . We start counting the days after the day we receive the physical infrared remote control from the customer or when we receive the infrared remote control codes.

How much does it costs?

The cost for the above service is fixed to $800. To make an order you have to pay 50% of the above price in advance and the remaining amaunt when we deliver the APK files to you.

Order Now

Price : $400

The above proposal is valid for developing an Infrared Remote Control Application for Smartphones with Android that have a built in Infrared Transmitter / Blaster. Most of the high-end Android Smartphones like Samsung Galaxy S5, S6, HTC One M8, HTC One M9 etc support this feature. We also provide the above service for Smartphones that lacks infrared transmitter / blaster. In this case a module like the Irdroid WiFi to Infrared adapter or the Irdroid Bluetooth has to be used in order to provide ability for Infrared transmission.

The image below is a link. Try to click on it.

Windows 8 Drivers workaround for Irdroid USB Transceiver

Windows 8 requires that all drivers need to be signed, The USB Infrared Transceiver can work with Windows 8 but the workaround is that you need to turn off the signed driver requirement.

You can deactivate the forcing of signed drivers by using following Settings.

Open a Command Prompt (cmd) as Administrator and type in following two commands.

bcdedit -set loadoptions DISABLE_INTEGRITY_CHECKS
bcdedit -set TESTSIGNING ON

With bcdedit you´re configurating the bootmenu of windows, so be careful. If something goes wrong you´ll need a windows dvd to repair the bootmanager.

After a restart you can install the driver normally. You just have to confirm to install the unsigned driver, just like in older versions of Windows.

The image below is a link. Try to click on it.

15% OFF for March on Irdroid USB & WiFi

Irdroid USB Infrared Transceiver

Irdroid USB Infrared Transceiver

We offer our Irdroid USB Infrared Transceiver module for just $32 or the Irdroid WiFi to Infrared module for $55 . The Discount is valid for March 2015 only!  Grab your’s from the links below:

The image below is a link. Try to click on it.

New version of the Irdroid USB App

The USB Infrared Transceiver for Android

The USB Infrared Transceiver for Android


Our Friend Martin Todorov has proposed a new beta version of the USB Infrared Transceiver App for Android , that can visualize the received Infrared signals. Martin has contacted us to contribute to the Irdroid USB Project. The new version of the IrdroidUSB Application can be downloaded from the links below:

Downloads:

You dont have a USB Infrared Transceiver?
Purchase one from the links below.

[print_thumbnail_slider]


The image below is a link. Try to click on it.

USB infrared transceiver App for Android™

Irdroid USB is another port of LIRC for Android. The difference here is that it supports the USB Infrared Transceiver. The Irdroid USB Infrared Transceiver can be directly connected to the target Android Smartphone / Tablet  via an micro USB OTG cable. The application is again open source and it is perfect for Android Developers.

Irdroid USB App Features:

  • Compatible with Android 4.0 +
  • Supports Irdroid USB Infrared Transceiver
  • Supports Irdroid USB Infrared Transmitter
  • Custom Log for monitoring the communication with the module
  • Automatically generate buttons from LIRC conf file.
  • Show / Hide the custom event LOG
  • Open Source Application

Downloads:

You dont have a USB Infrared Transceiver?
Purchase one from the links below.

[print_thumbnail_slider]


The image below is a link. Try to click on it.

Controlling air conditioner with Irdroid

Controlling Amcor sf10000e with Irdroid

Controlling Amcor sf10000e with Irdroid

Many people has asked me weather it is possible to control Air Conditioners via
Irdroid / LIRC . The Answer is yes, it is and there are people out there who are
already controlling AC’s with Irdroid. Our Friend Ben Mitchell controls his
mobile air conditioner Amcor sf10000e with the Irdroid WIFI to infrared adapter and the Amote app for Android.

The Current Irdroid / Lirc Database contains many , but not all the remotes on
the market so Ben, has used the USB Infrared Transceiver to record the sf10000e
remote control keys, then he has uploaded the created file to his Irdroid wifi
unit. Now he is able to control not only his TV’s and STB’s but also his Air Con
ditioner unit. He was so kind to provide us with the scanned remote codes , now
the codes for this AC unit is included in Irdroid database. We will also send the file to
the admins of the LIRC/Winlirc projects so that other people can also benefit.

Downloads:

Here is what Ben says about Irdroid / Irdroid Wifi to infrared adapter:

Great stuff, thanks hopefully it will help someone else out. Will let u know how I get on with wireless configuration